When working remotely, maintaining strong communication between your team and your customers is crucial. By creating higher-quality video content, not only can you create a resource for your customer but you can leave an impression and build brand affinity at the same time. Build a connection with your audience from the comfort of your couch with these tips on setting up a video station at home.
Related Blog: How to Run Your Business While Working RemotelyConnecting With People Through Video Content
If you work from home, you’re probably already familiar with some of the video conferencing tools available online that will help you and your team stay connected. But, you might be wondering how you can stay connected with your customers and online audience? That’s where high-quality video content comes into play.
Video is becoming a powerful tool for marketers everywhere and is the premier way to create content that engages your audience, builds your brand, and develops brand affinity.
If you haven’t waded into the video waters just yet, there’s no better time than the present to at least dip your toes in, especially if you find yourself working from home. Most people don’t even realize how easy it is to make professional videos from their home and, most likely, you already have all the tools you need like your computer’s built-in webcam, microphone, and the light of the sun through your windows.
Learn More About Video Marketing: Download Our Free Guide
But how can you take your video quality to the next level at home? Here are some of the quick steps we took to upgrade our at-home videos and video studios.
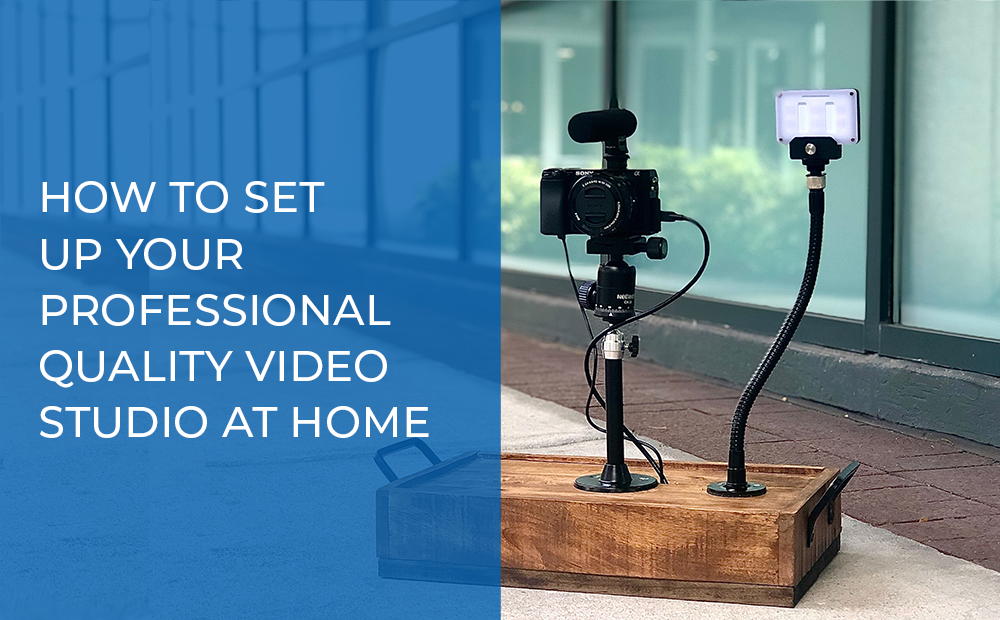
Before and after building an at-home video studio with lighting, audio, and a high-quality camera
Improving the Quality of Your Home Videos
Improving the quality of the actual video footage in your content will have quick positive results on your views and engagement. People are more drawn to watch videos, live streams, etc. if the quality is higher rather than something grainy and low-quality.

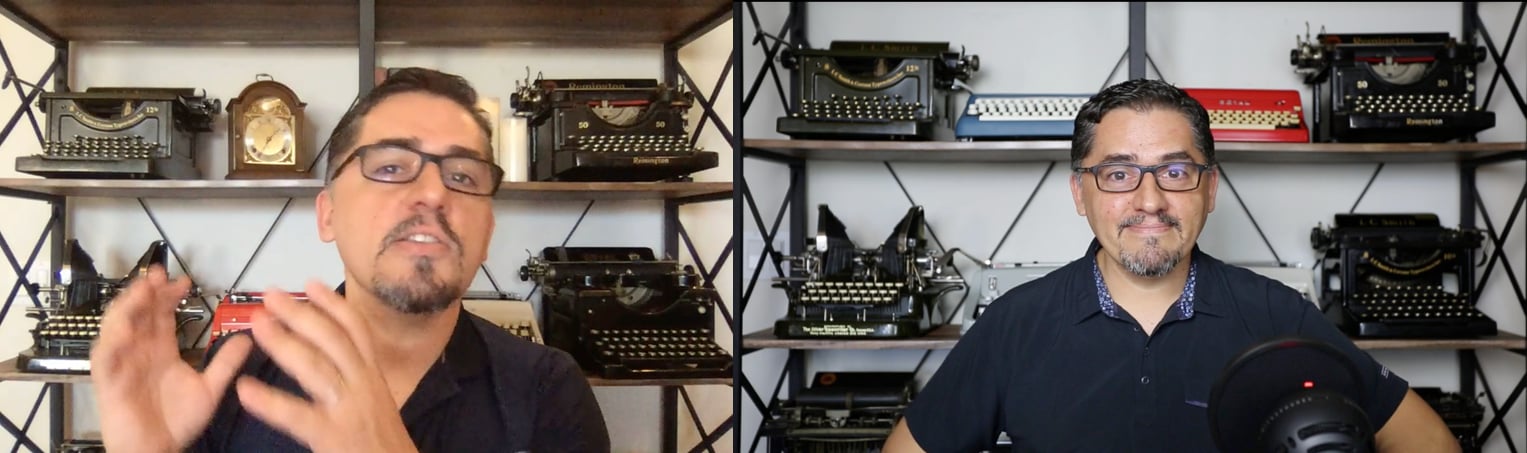
The difference between a standard webcam and a Sony A7iii used as webcam
How do you improve your video quality? The easy answer is: get better equipment. You can invest in a video capture device that—paired with any camera equipped with a video signal output—can easily replace your webcam while maintaining the ease of recording on your computer.
How to Build Your Own Soapbox Station at Home
When we say “better equipment,” this can vary quite a bit due to camera brand and all of the quality specifications. A great place to start is the Soapbox Station by Wistia; A Professional-quality, on-the-go video studio (in their words).
A Soapbox Station consists of a mounted camera, light, and microphone and is equipped with all of the cabling and converters you need to have an all-in-one mobile studio.
We’ve been using Soapbox stations for a while now around the office and they are quick, reliable, and great quality, providing the perfect studio you can have wherever you may be.
Soapbox might be the solution for you, but you still might be asking yourself “How do I build one?” Thankfully, we have a one-stop shop guide for your build.
Related Blog: Make Easy Professional-Quality Videos With Soapbox by Wistia
Video Home Studio - Itemized list:
- Dummy Battery
- Ball Head
- Sony a6100
- Rode Micro Mic
- Mounting Pole for Camera
- Base Bracket for light
- Gooseneck Flex Mount
- Extension pole for light mount
- Aputure light
- Mic Mount to ¼ 20
- Video Capture Device
- HDMI cable for camera
Additionally, you will need a power drill, ¾ inch paddle drill bit, and screws.

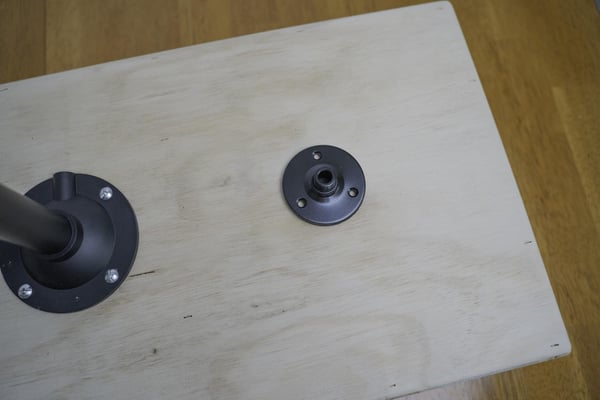
Step 1: First, you will want to find the exact placement for your base mounts. You can decide whether you want the camera on the left or right but, in this demonstration, we will put it on the left and the lighting on the right. Create a mark where you want to mount them and set aside to drill ¾ inch hole for camera mount. No hole needed for a light mount as we won’t be running any cables through the box.
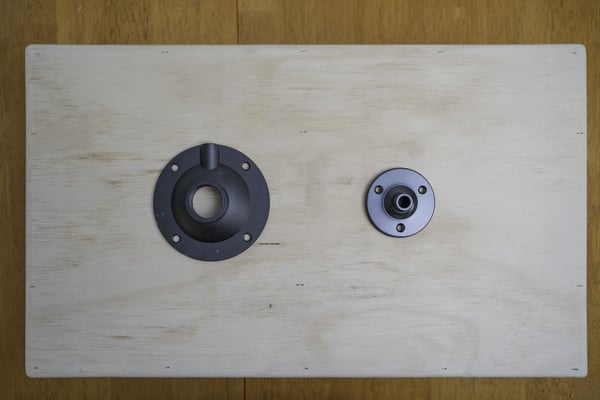
Place your base mounts in the center of the box.
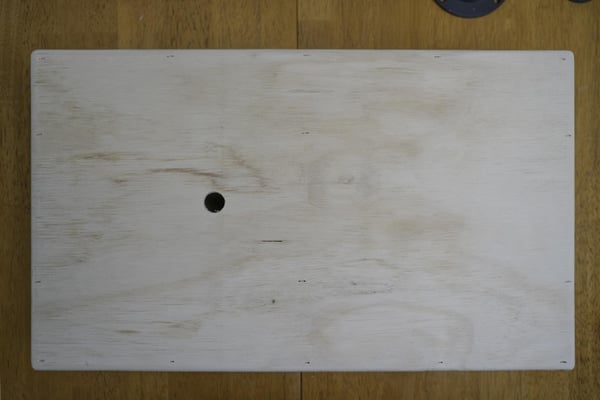
Place a mark on the box where you will drill the hole (note: no hole needed for light mount)
Step 2: Once you’ve created the ¾ inch hole, weave the HDMI cable and dummy battery cable through the hole, through your base mount, and finally through the mounting pole. You can pull the cables out from the side of the Apple box.
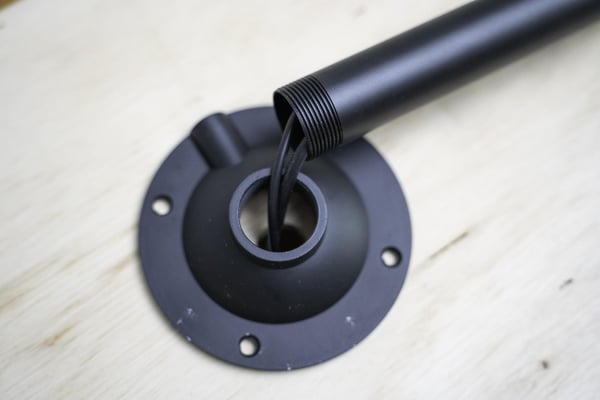
Weave the HDMI cable and battery cables through the drilled hole and through your mounting base.
 Next, pull the cords through the pole mount.
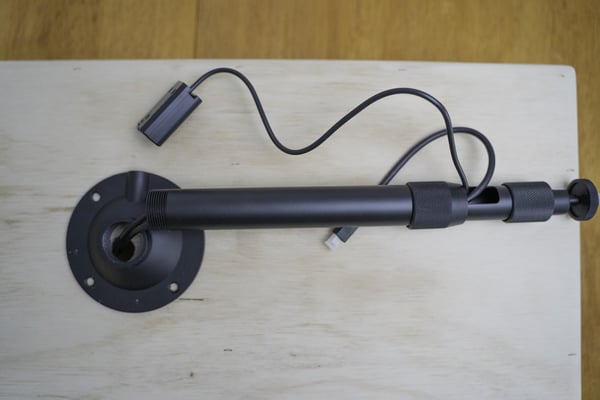
Finally, you can pull the USB end of the cords through one of the box's side holes.
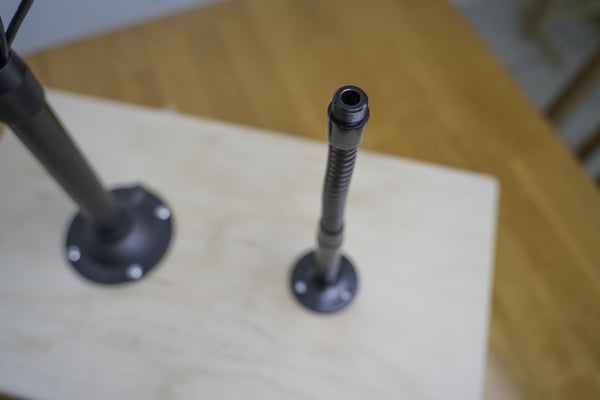
Step 3: Now that you have the cables weaved, use your drill to put in the necessary screws and lock down the base. Once the base is locked down, screw in the mounting pole to create your stand.

Use your drill to screw in the base mount to the top of the box and affix mounting pole.
Step 4: Now that your mounting pole is up and firmly connected, add the ball head by screwing it on. Then, remove the plate from the ball head and attach it to the camera. You’ll also want to mount the microphone above the camera and plug it into the microphone jack.
Once you have that, connect the camera to the ball head and firmly connect the HDMI cable and dummy battery. You now have your camera side finished!
The camera correctly mounted on the base and pole mounts.
Step 5: With your HDMI cable coming out of the side of your Soapbox, plug it into the capture device—make sure it’s plugged into the ‘HDMI in’ section. You can then clean up the cables and put the capture device within the box for a clean fit.
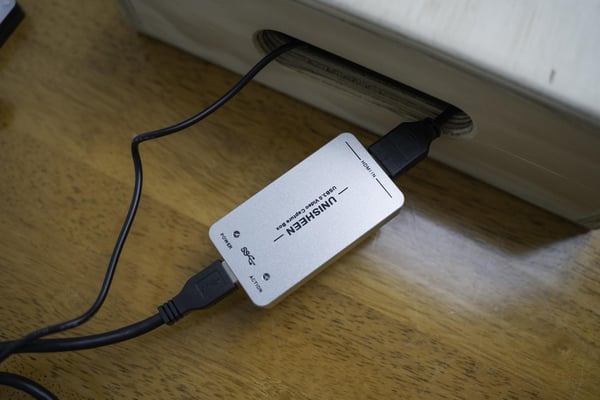 Plus in your capture card into the HDMI cord.
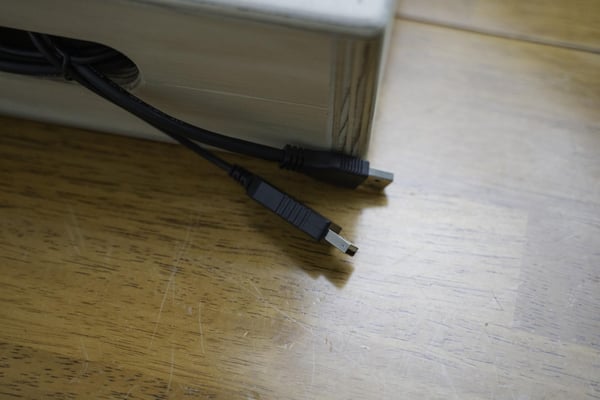
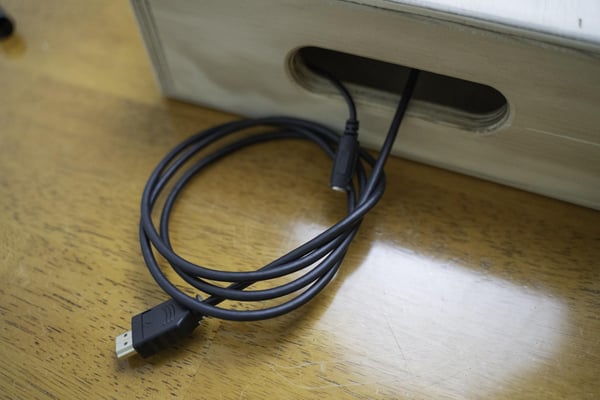
USB cords tied and tucked neatly against the box.
Step 6: It’s time to mount the lighting! Find the marking you created at the beginning of the build and screw the base into the Soapbox. Once you’ve added the base, screw on the extension arm and gooseneck to the mount. Add the ¼ 20 screw adapter to the gooseneck for the ability to mount the light and then simply screw the light into the top.
 Screw in the base mount for the lighting fixture to the side of the camera mount.
 Next, attach the pole mount.
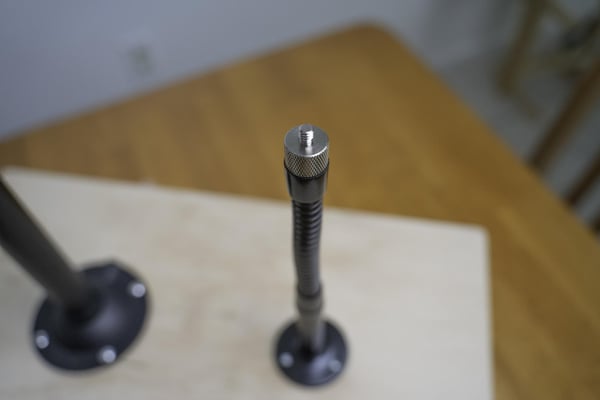
Last, attach the adapter to the end of the pole mount and attach light.
Step 7: Take a step back and marvel at how well you did building your Soapbox! The two USB’s will allow power to the camera as well as the capture device. You can additionally plug the light in via USB for constant power or allow it to charge before use so you don’t need cables.
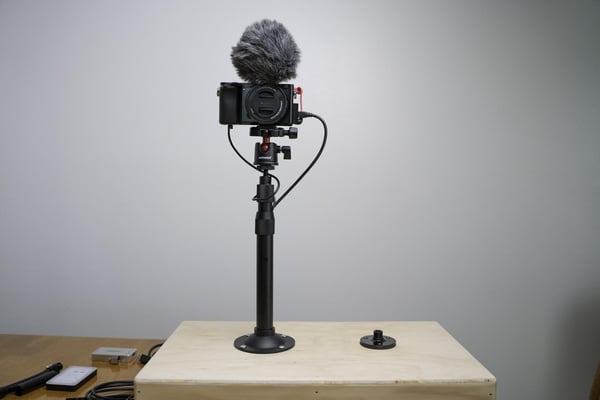
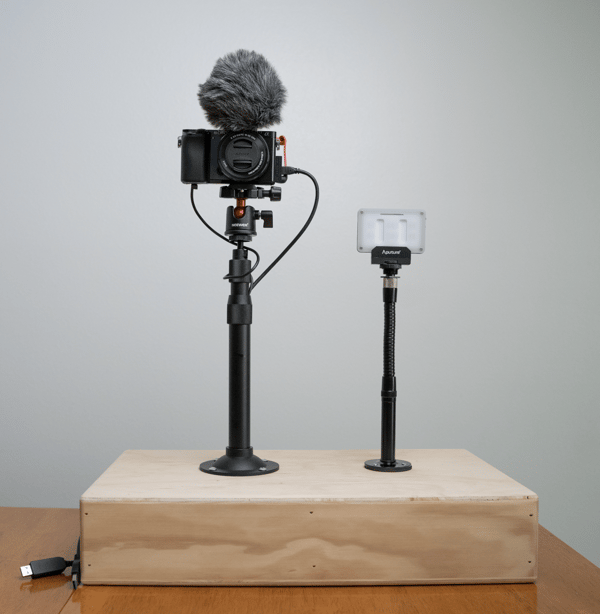 The finished product! A fully-built soapbox station.
Using Your Own Camera in Your At-Home Studio
Many people today already have some sort of DSLR or mirrorless camera that they use to take photos or videos. So, it can feel like a waste to build something entirely new. If you fall into this category, the first thing to do is check the video outputs on the camera. In most of today’s cameras, the video output is a certain size of an HDMI port like our Sony a6500 (micro HDMI) or Canon 5D mk iii (mini HDMI). We encourage you to double check the video outputs on your camera with some research as all camera models have different processes to send the video signal through the output.
Once you’ve determined that your camera has a video output, you would need to run the video signal to a capture device. This device is what converts your video camera signal into a HD video transmission and makes the camera usable in replacement as your webcam. The capture device will then hook directly into a computer for a direct connection.
Depending on your operating system, you will then need to navigate to your system settings and find your webcam options. There you will be able to select the capture device as your main webcam.
Once you have your camera up and running as a webcam, the next steps are to complement your video with lighting and audio for the full package.
How Lighting Can Help Your Video Content
Never underestimate the ability of lighting to improve the quality of your videos. It’s something that may seem complicated, but a few simple changes—like the tips below—and the quality of your video content takes a massive leap forward.

Before and after using proper lighting techniques
Use Natural Light
If you’re building your makeshift home video studio on the fly, odds are you won’t have access to professional lighting kits. So, we make do with the power of the sun. Use the natural light pouring in from your windows to your advantage.
How to Set Up the Position of Your Lights
First, don’t position the light source behind you; this will typically overexpose the background or silhouette you as the subject, leaving a dark and grainy image. At the time, light directly in front could create a very flat image—depending on if the light is soft enough. If the light is on the side, it could create too much contrast between the sides of your face.
To combat these issues, you need to fight light with light. Here’s a quick guide to optimizing your at-home lighting for the best quality:
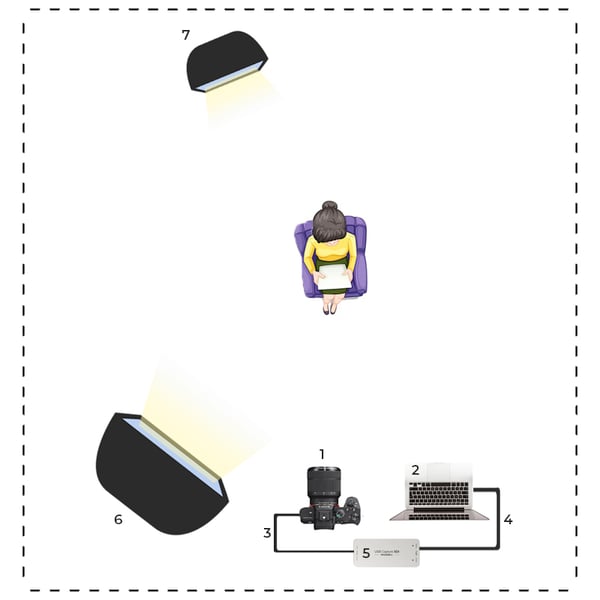 A quick guide to setting up the lights around your at-home setup
We are currently using Neewer SL-60 LED light with a Neewer Softbox. As you can see from above, by adding two lights to offset each other, we can create a soft, even light for our subject.
The Importance of Using High-Quality Microphones for Sound
Unless you’re making a silent film, the quality of your microphone is of the utmost importance to your content. You want your audience to fully understand what you’re saying and stay engaged throughout the video so they can get all of the value out of it and nothing will turn people off more to you than low-quality sound. This goes doubly if you plan on converting your video into a podcast.
For microphone solutions, invest in a shotgun or lavalier microphone to help isolate your voice from the background noises and maintain steady, high-quality audio.
Making high-quality video content from home is a lot close than it may appear. Many of the tools you need to get started are already around you and—with our tips and tricks—you can build the perfect home video studio and start making great content—that connects with your audience and builds your brand—today.